# Prerequisites for OIDC Authentication
This guide will walk you through the following steps with your identity provider:
1. Create and register an application with your identity provider.
2. Obtain client credentials and discovery URI to be used in DataHub.
Choose your identity provider to get started:
## Google Identity
### Step 1. Create and Register your App
#### 1. Create a project in the Google API Console
Using an account linked to your organization, navigate to the [Google API Console](https://console.developers.google.com/) and select **New project**.
Within this project, we will configure the OAuth2.0 screen and credentials.

#### 2. Create OAuth2.0 consent screen
Navigate to **OAuth consent screen**. This is where you'll configure the screen your users see when attempting to log in to DataHub. Select **Internal** (if you only want your company users to have access) and then click **Create**.
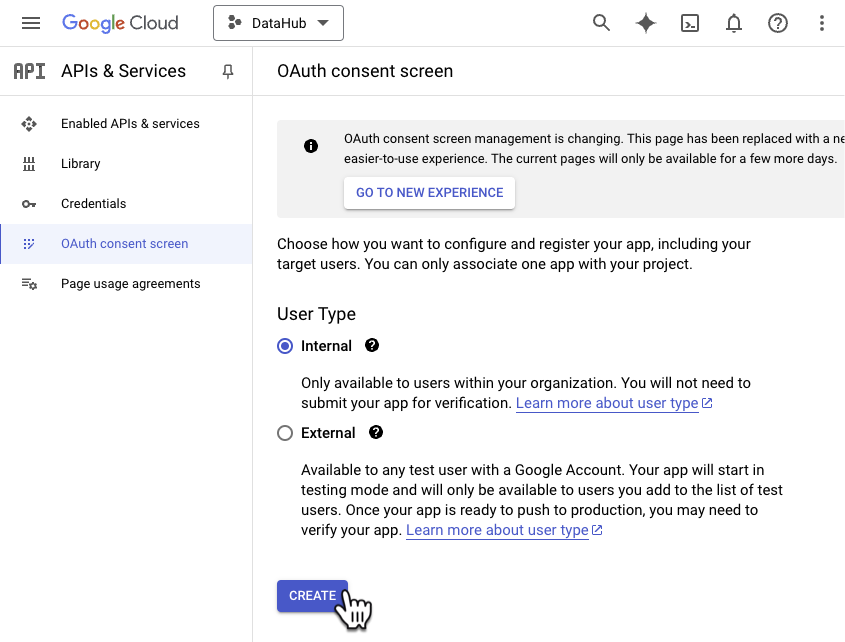
_Note that in order to complete this step you should be logged into a Google account associated with your organization._
Fill out the details in the App Information & Domain sections. Make sure the 'Application Home Page' provided matches where DataHub is deployed at your organization.

Once you've completed this, **Save & Continue**.
#### 3. Configure the appropriate scopes
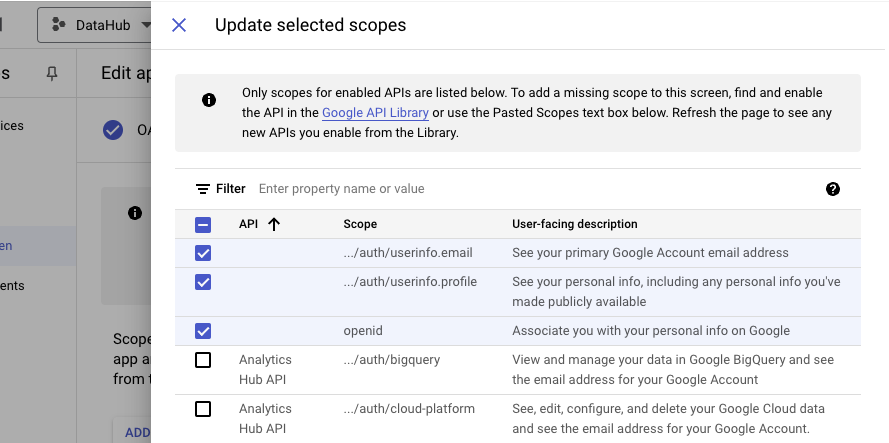
Next, click **Add or Remove Scopes**. Select the following scopes and click **Save & Continue**.
- `.../auth/userinfo.email`
- `.../auth/userinfo.profile`
- `openid`
### Step 2. Create Client Credentials
The following steps will walk you through generating a Client ID and Client Secret.
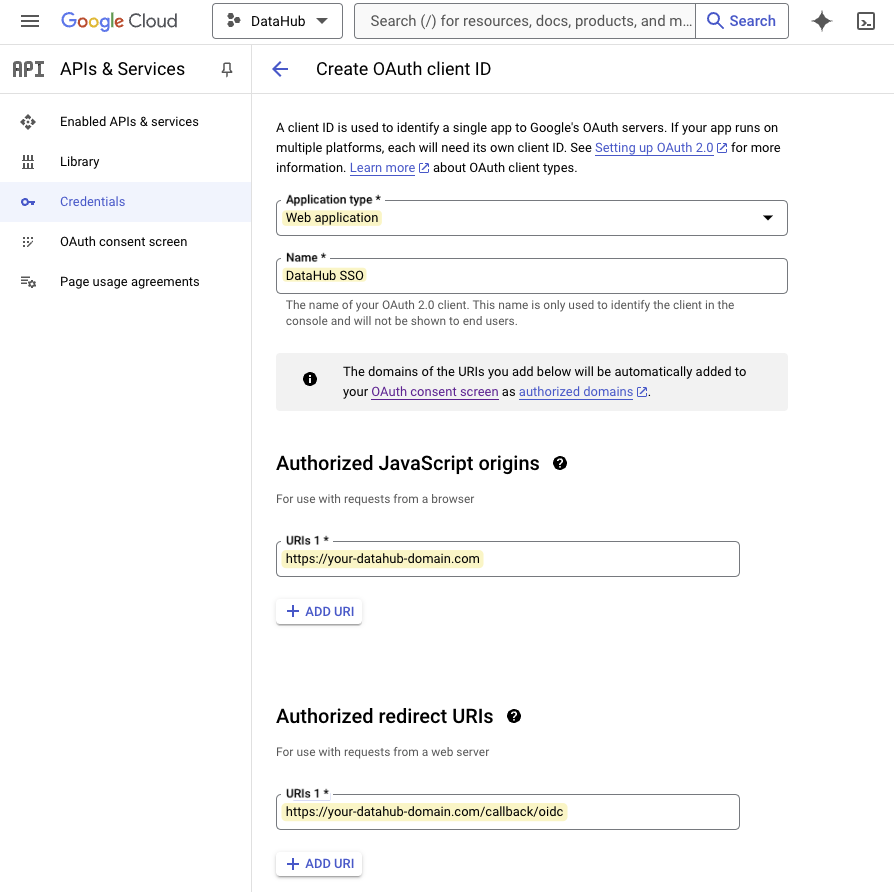
1. Navigate to the **Credentials** tab and click **Create Credentials**.
2. Select **OAuth client ID** as the credential type.
3. On the next screen, select **Web application** as your Application Type.
4. In **Authorized JavaScript Origins**, add the domain where you are hosting DataHub, i.e. `https://your-datahub-domain.com`.
5. In **Authorized Redirect URLs**, add the domain where you are hosting DataHub with the path `/callback/oidc` appended, i.e. `https://your-datahub-domain.com/callback/oidc`.
6. Click **Create**.
This will generate a **Client ID** and **Client Secret**:

You will need these values in the next step, in addition to the following **Discovery URI**:
```
https://accounts.google.com/.well-known/openid-configuration`
```
## Okta Identity
### Step 1. Create and Register your App
#### 1. Create an application in Okta Developer Console
Log in to your Okta admin account and navigate to the developer console. From there:
1. Select **Applications**
2. Click **Add Application**
3. Click **Create New App**
4. Select **OpenID Connect** as the Sign On method
5. Choose **Web** as the Platform
6. Click **Create**
#### 2. Configure application settings
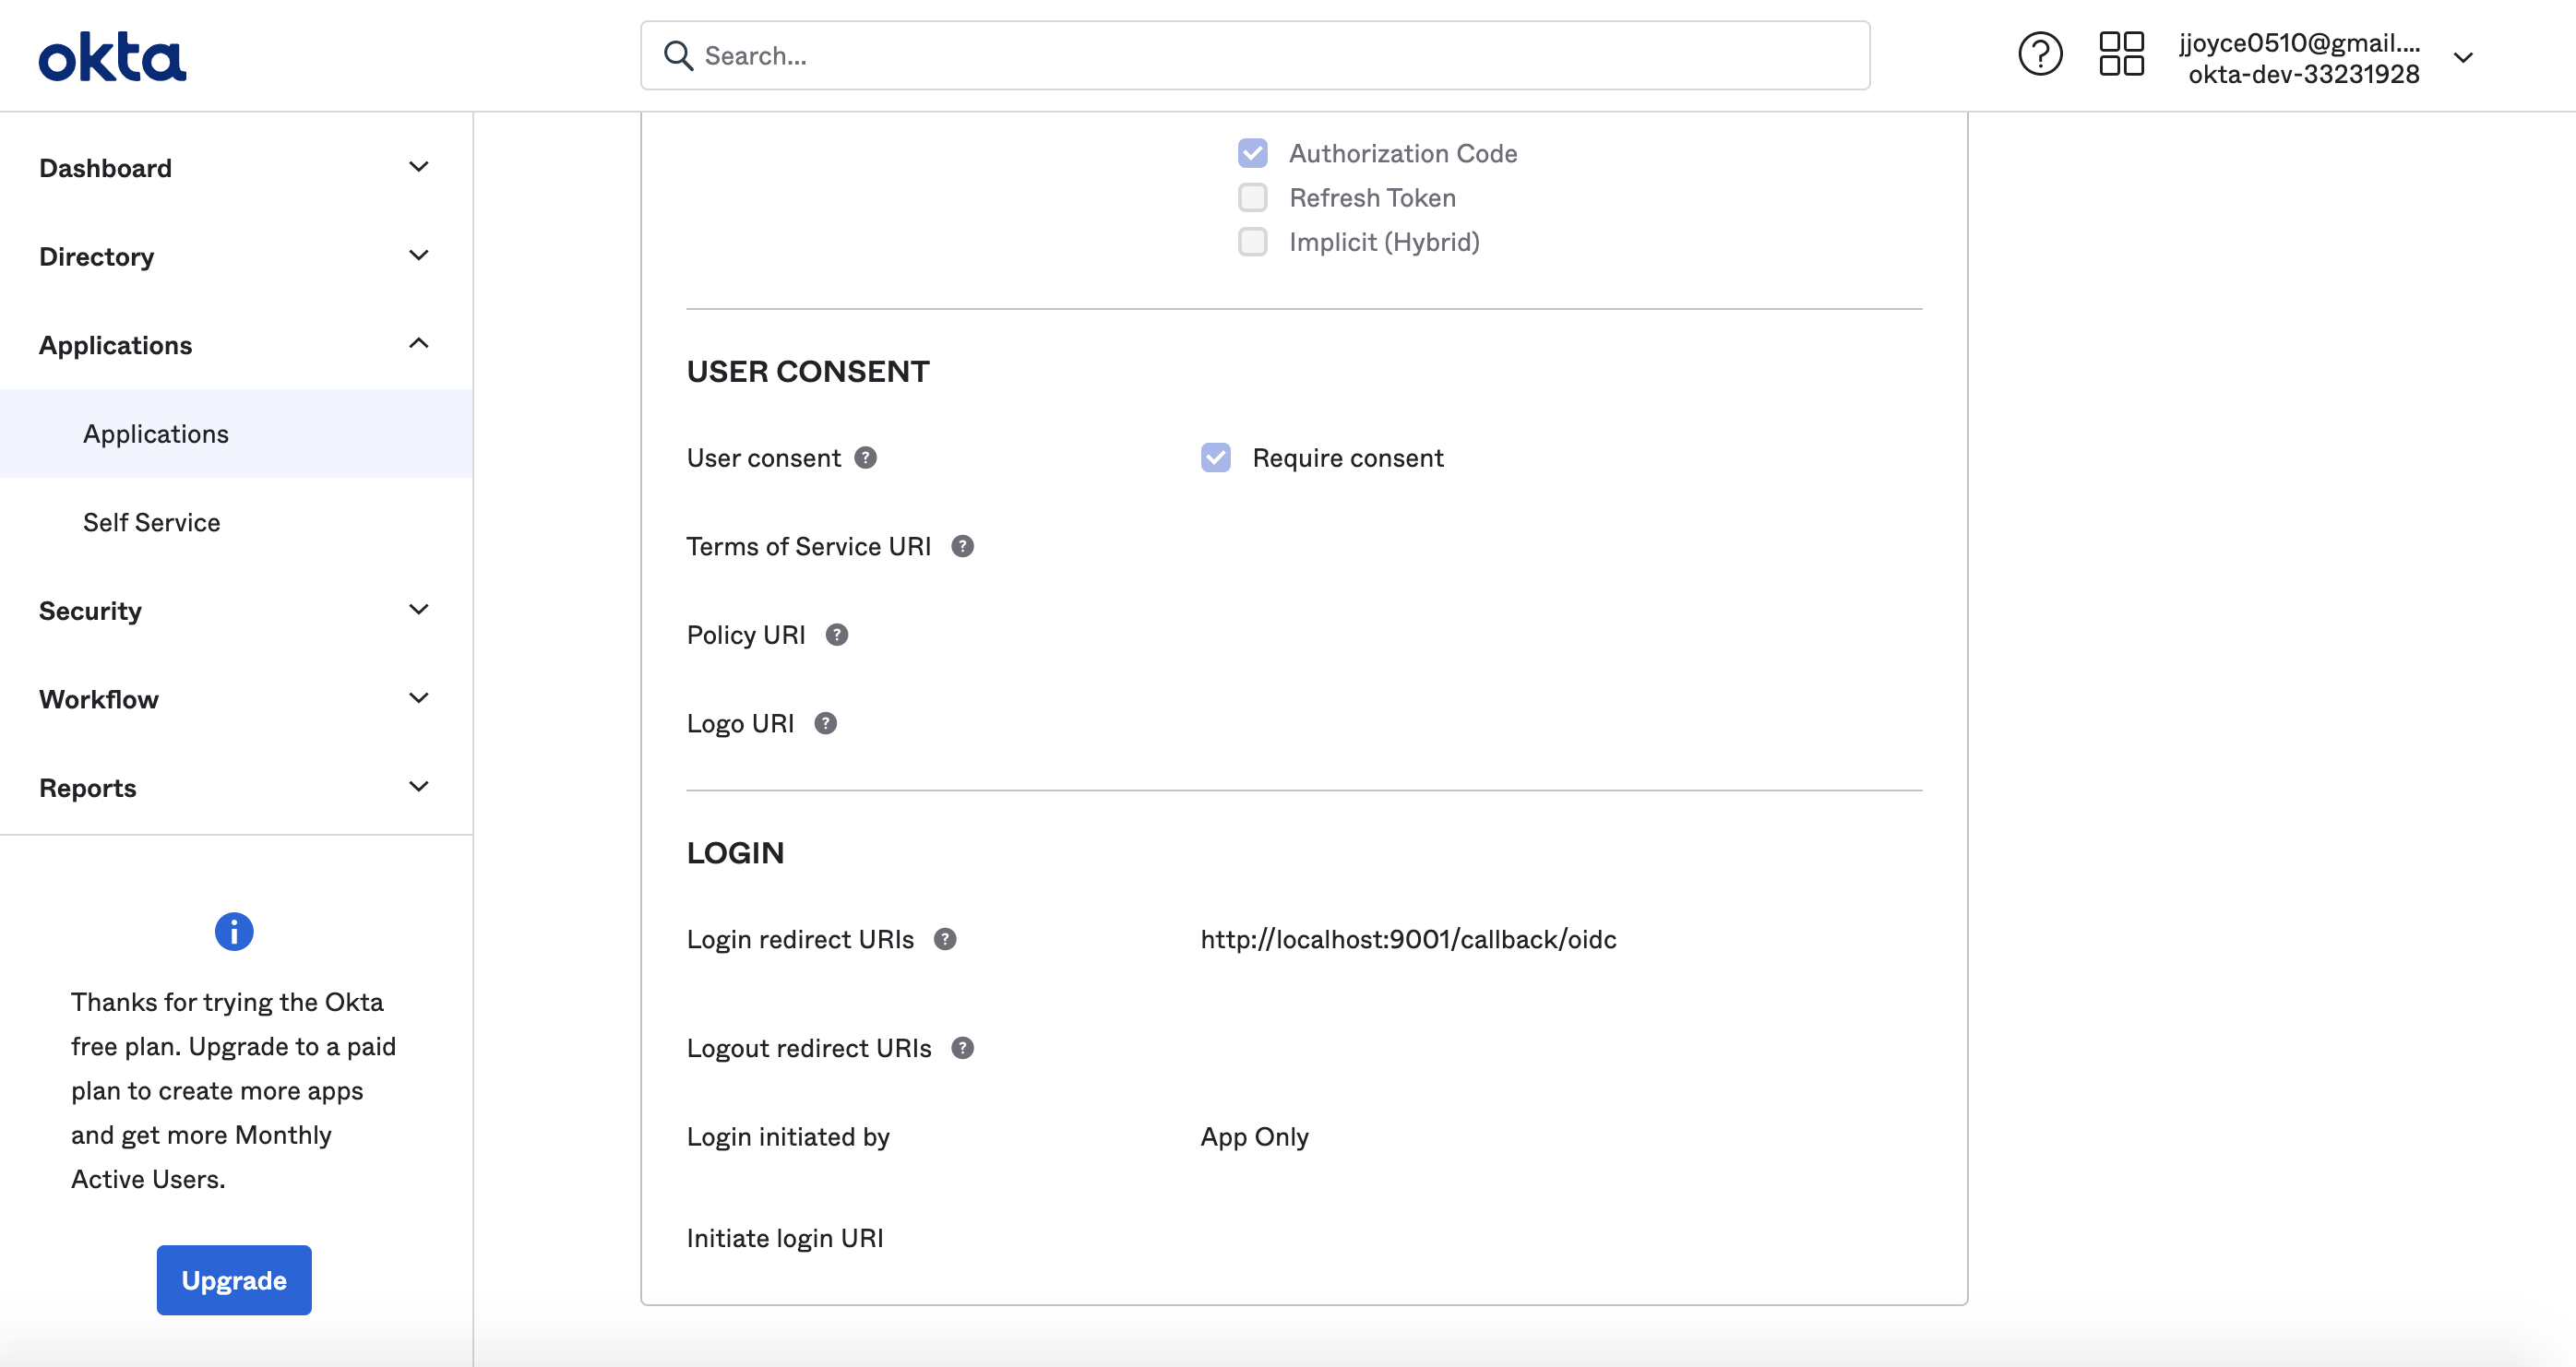
Under **General Settings**, provide a name for your application and configure the following URIs:
- Login Redirect URI: `https://your-datahub-domain.com/callback/oidc`
- Logout Redirect URI: `https://your-datahub-domain.com/login`
#### 3. Configure Okta Tile (Optional)
If you plan to enable DataHub login as an Okta tile, configure the Initiate Login URI:
- For production: `https://your-datahub-domain.com/authenticate`
- For local testing: `http://localhost:9002`
### Step 2. Locate Client Credentials and Discovery URI
After registering your app, navigate to the **General** tab to find the following Client Credential values:
- **Client ID**: Public identifier for the client that is required for all OAuth flows.
- **Client Secret**: Secret used by the client to exchange an authorization code for a token.
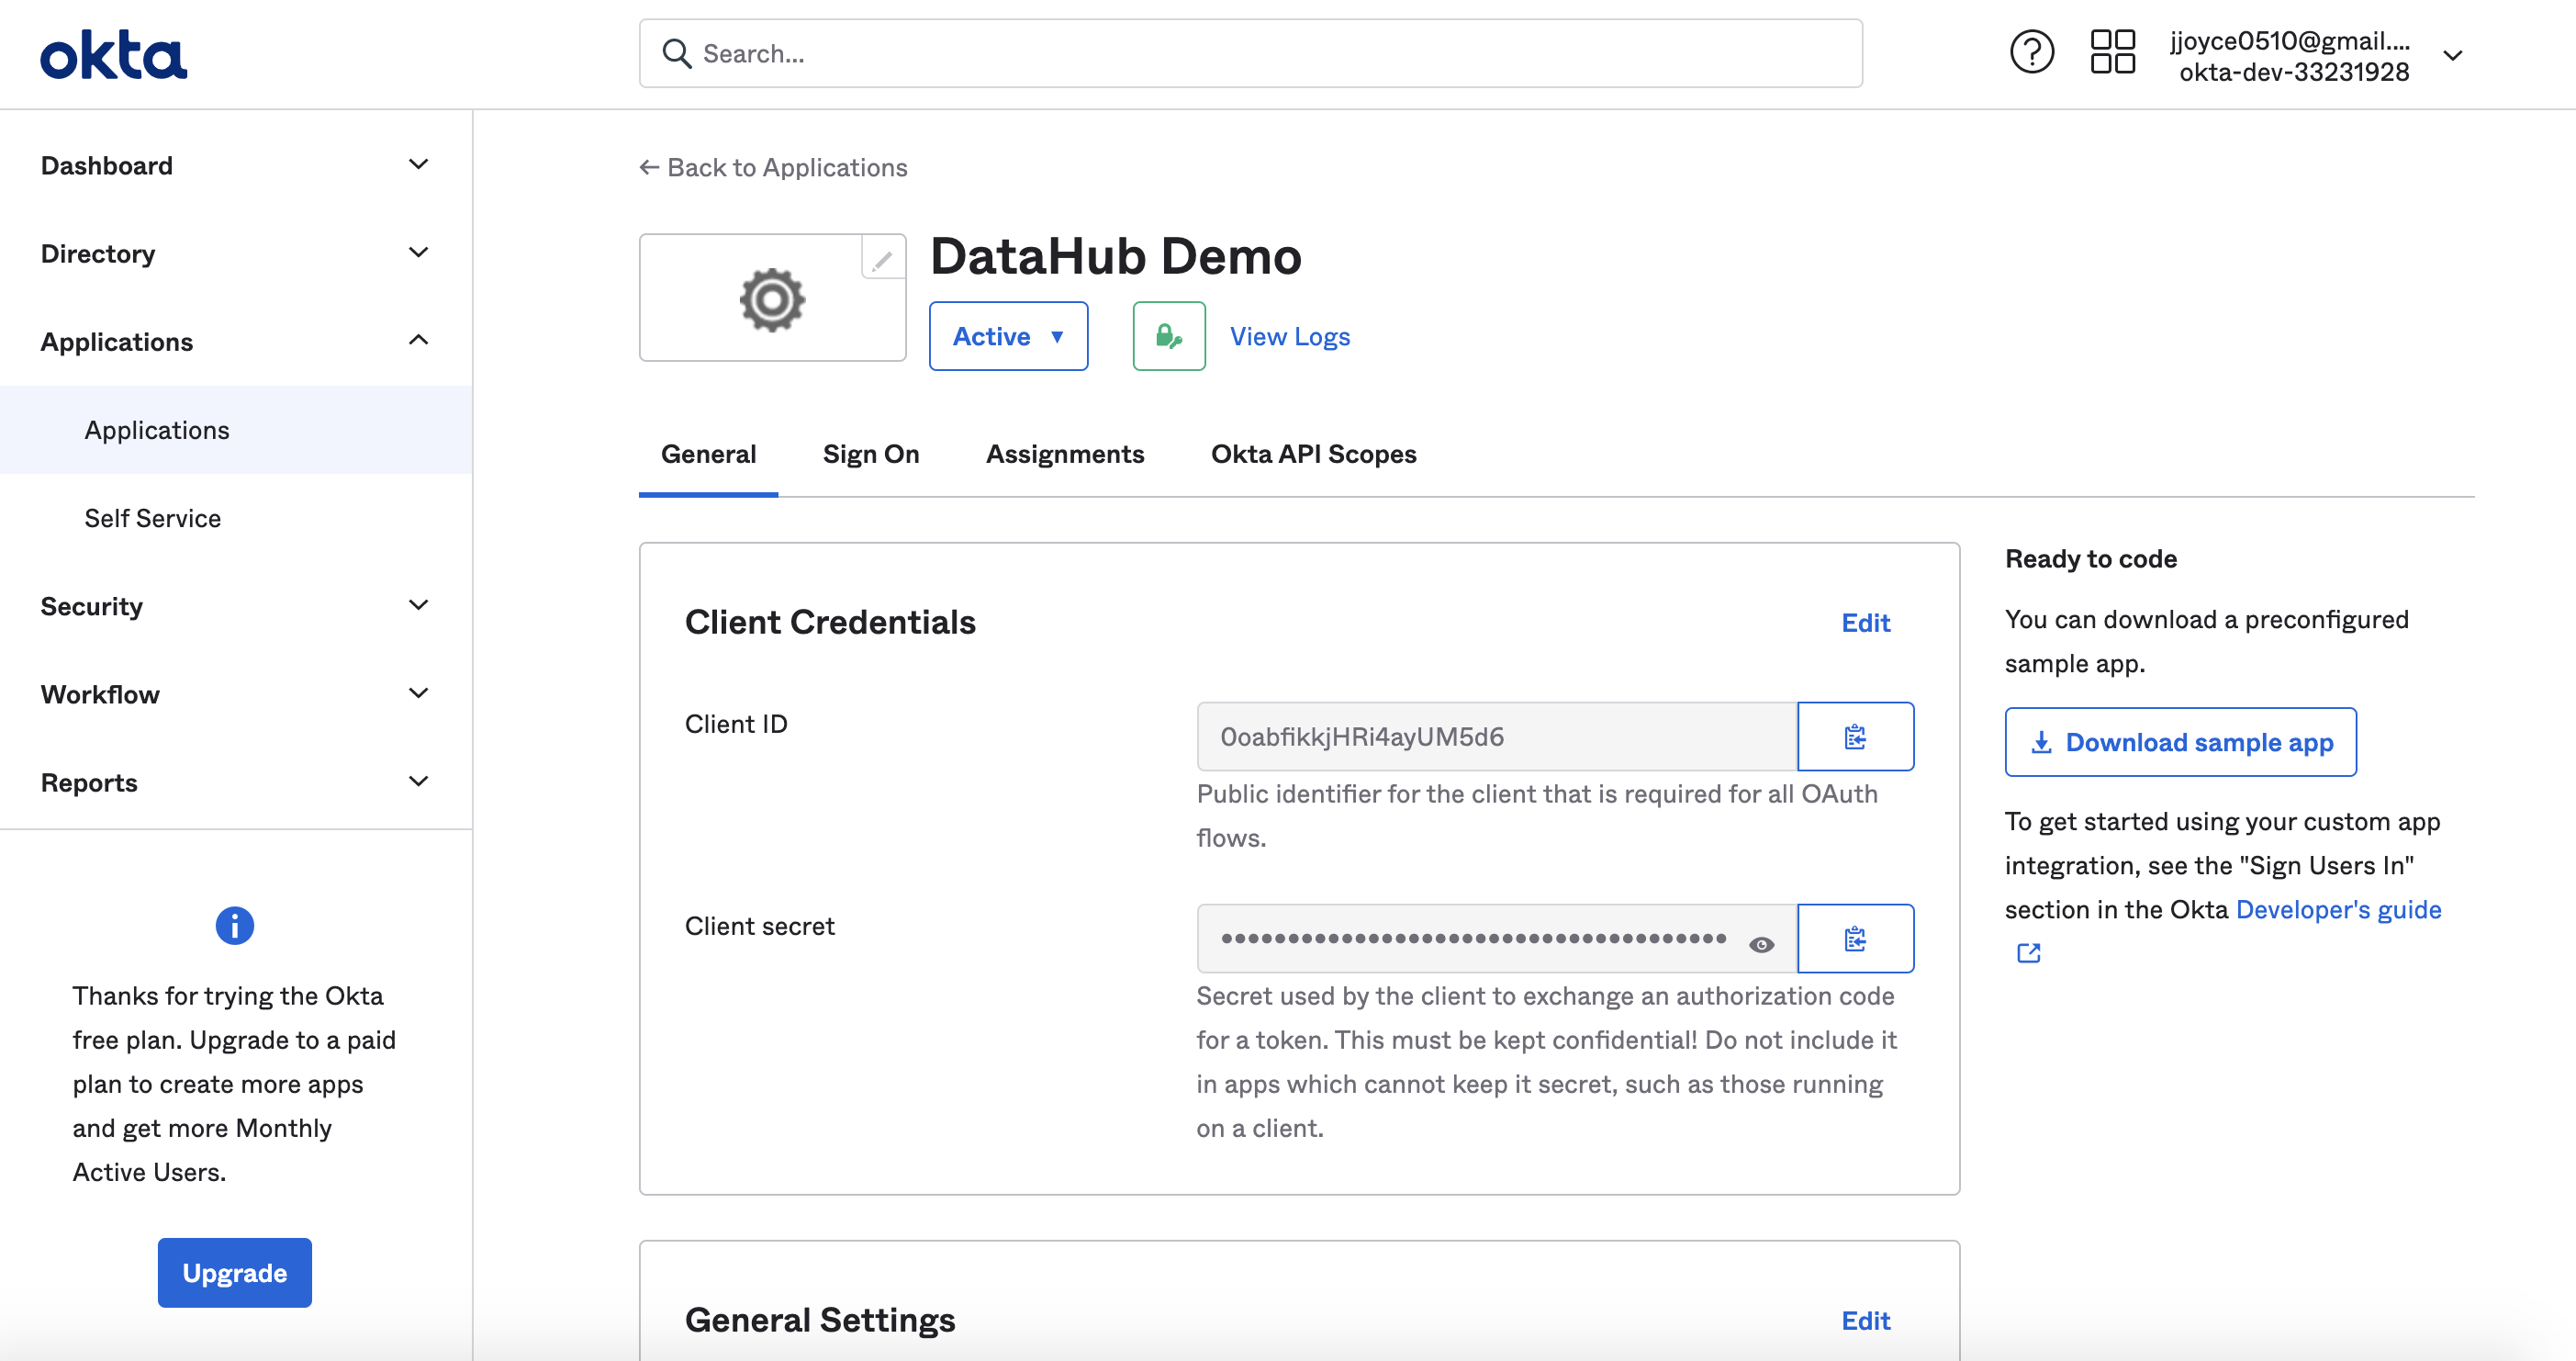
You will need these values in the next step, in addition to the following **Discovery URI**:
```
https://your-okta-domain.com/.well-known/openid-configuration
```
## Azure AD
### Step 1. Create and Register your App
#### 1. Create an application in Microsoft Azure portal
Using an account linked to your organization, navigate to the [Microsoft Azure Portal](https://portal.azure.com). From there:
1. Select **App Registrations**.
2. Click **New Registration** to register a new app.
3. Provide a Name for the application and choose the supported account types.
4. Under **Redirect URI**, choose **Web** and enter `https://your-datahub-domain.com/callback/oidc`. NOTE: You can add more later.
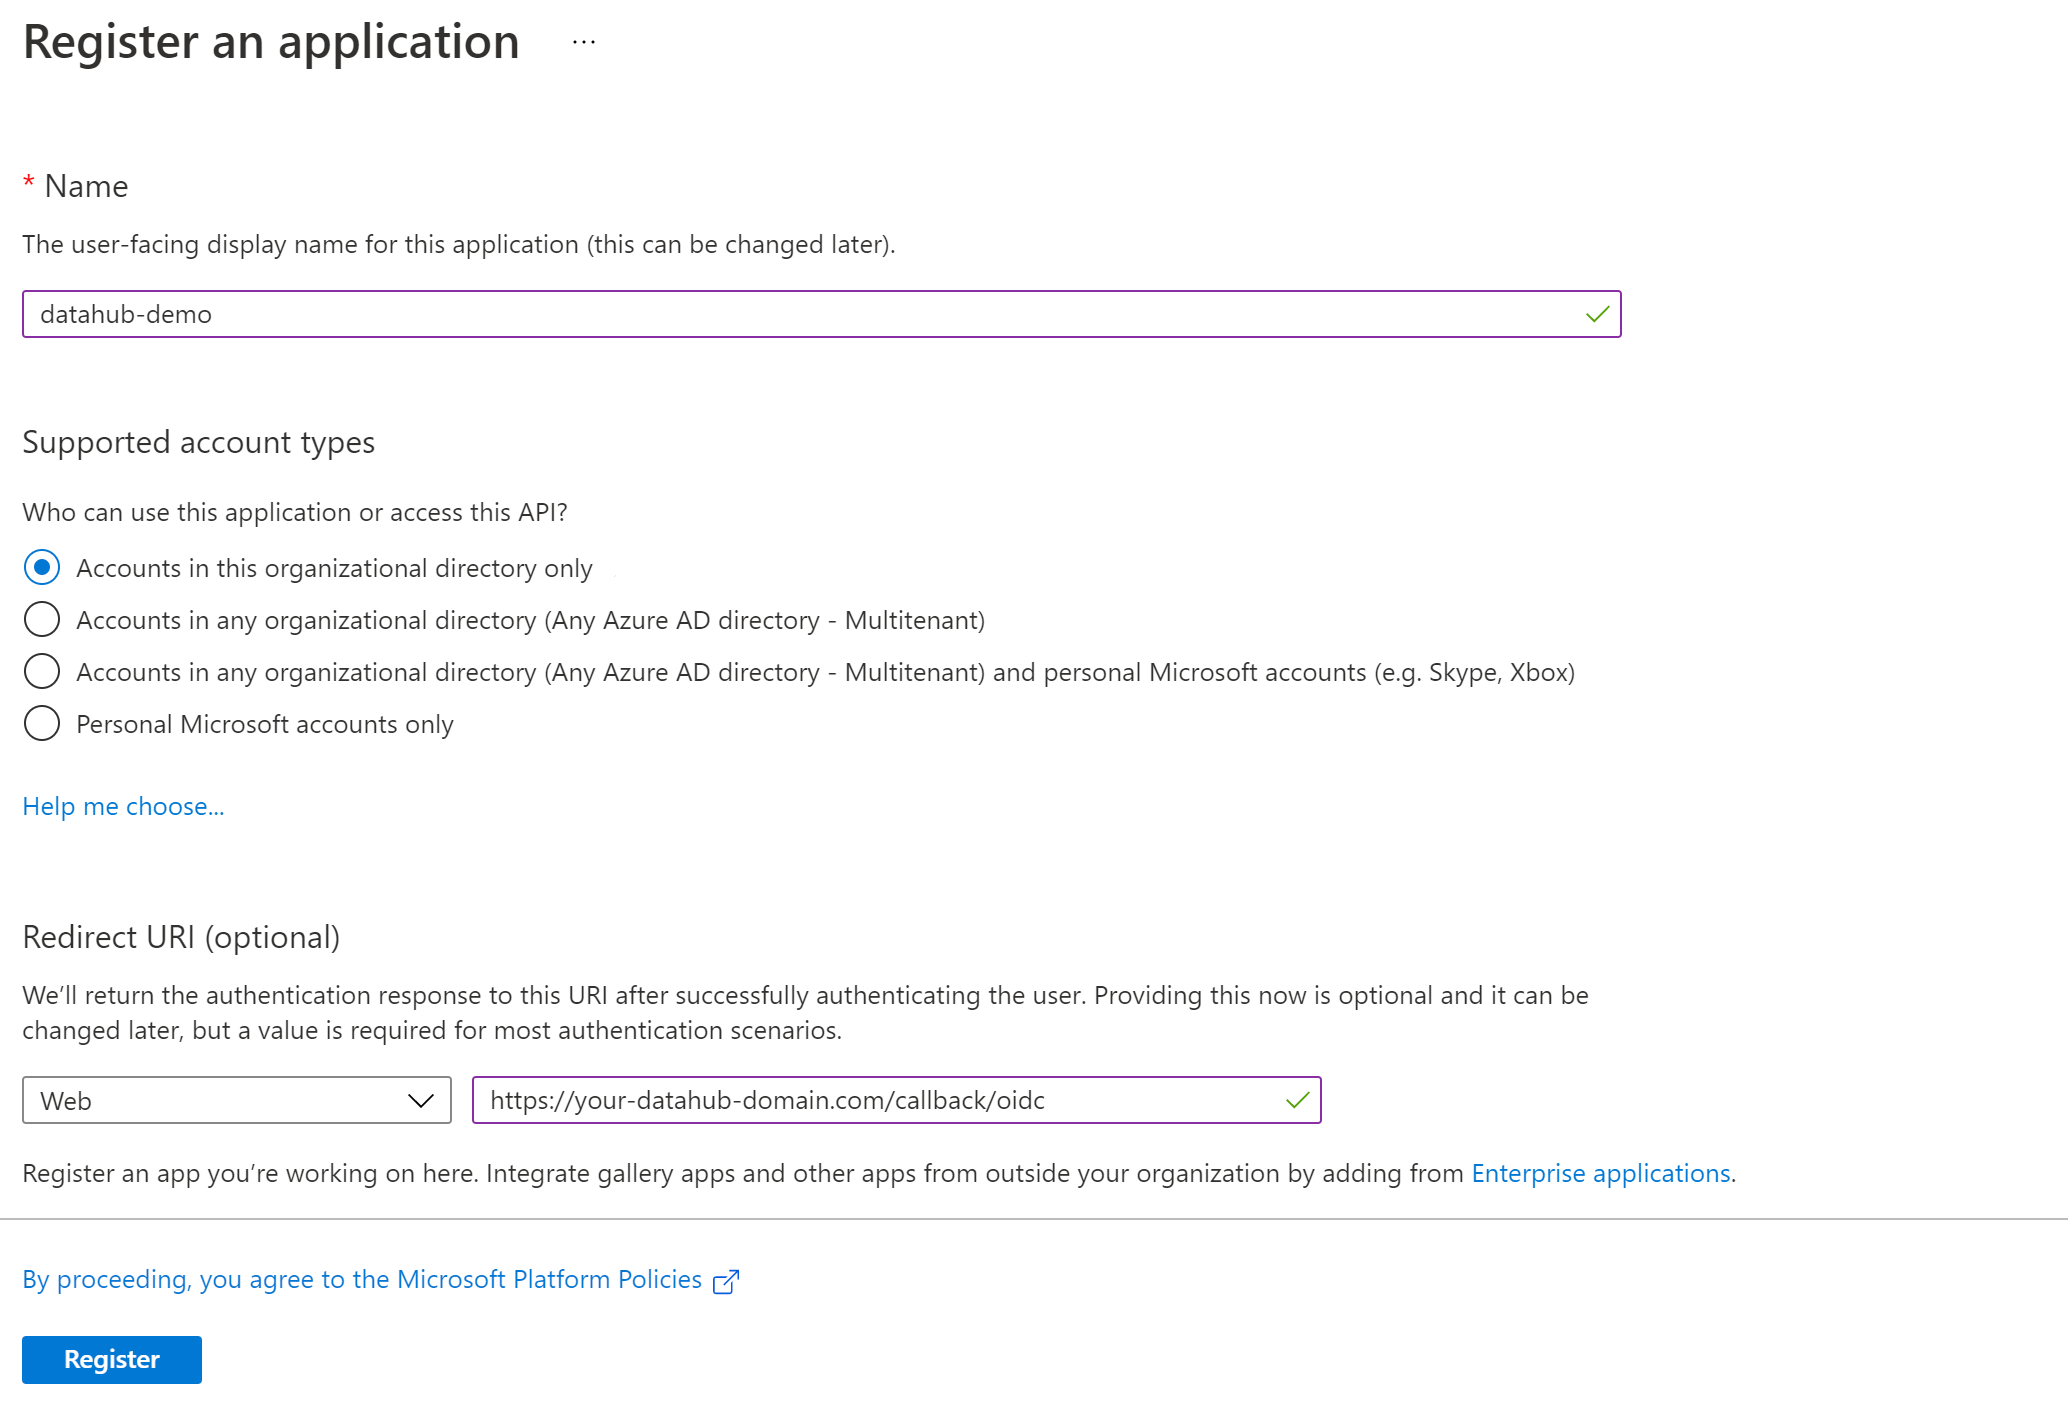
5. Click **Register**.
#### 2. Configure Logout URL
Once registration is complete, you will need to configure the Logout URL, which is required for SSO to work correctly.
1. Navigate to **Authentication** from the left-side navigation menu.
2. Set **Front-channel logout URL** to `https://your-datahub-domain.com/login`.
3. Optionally add additional Redirect URIs, such as `http://localhost:9002/callback/oidc` for local testing.
4. Click **Save**.
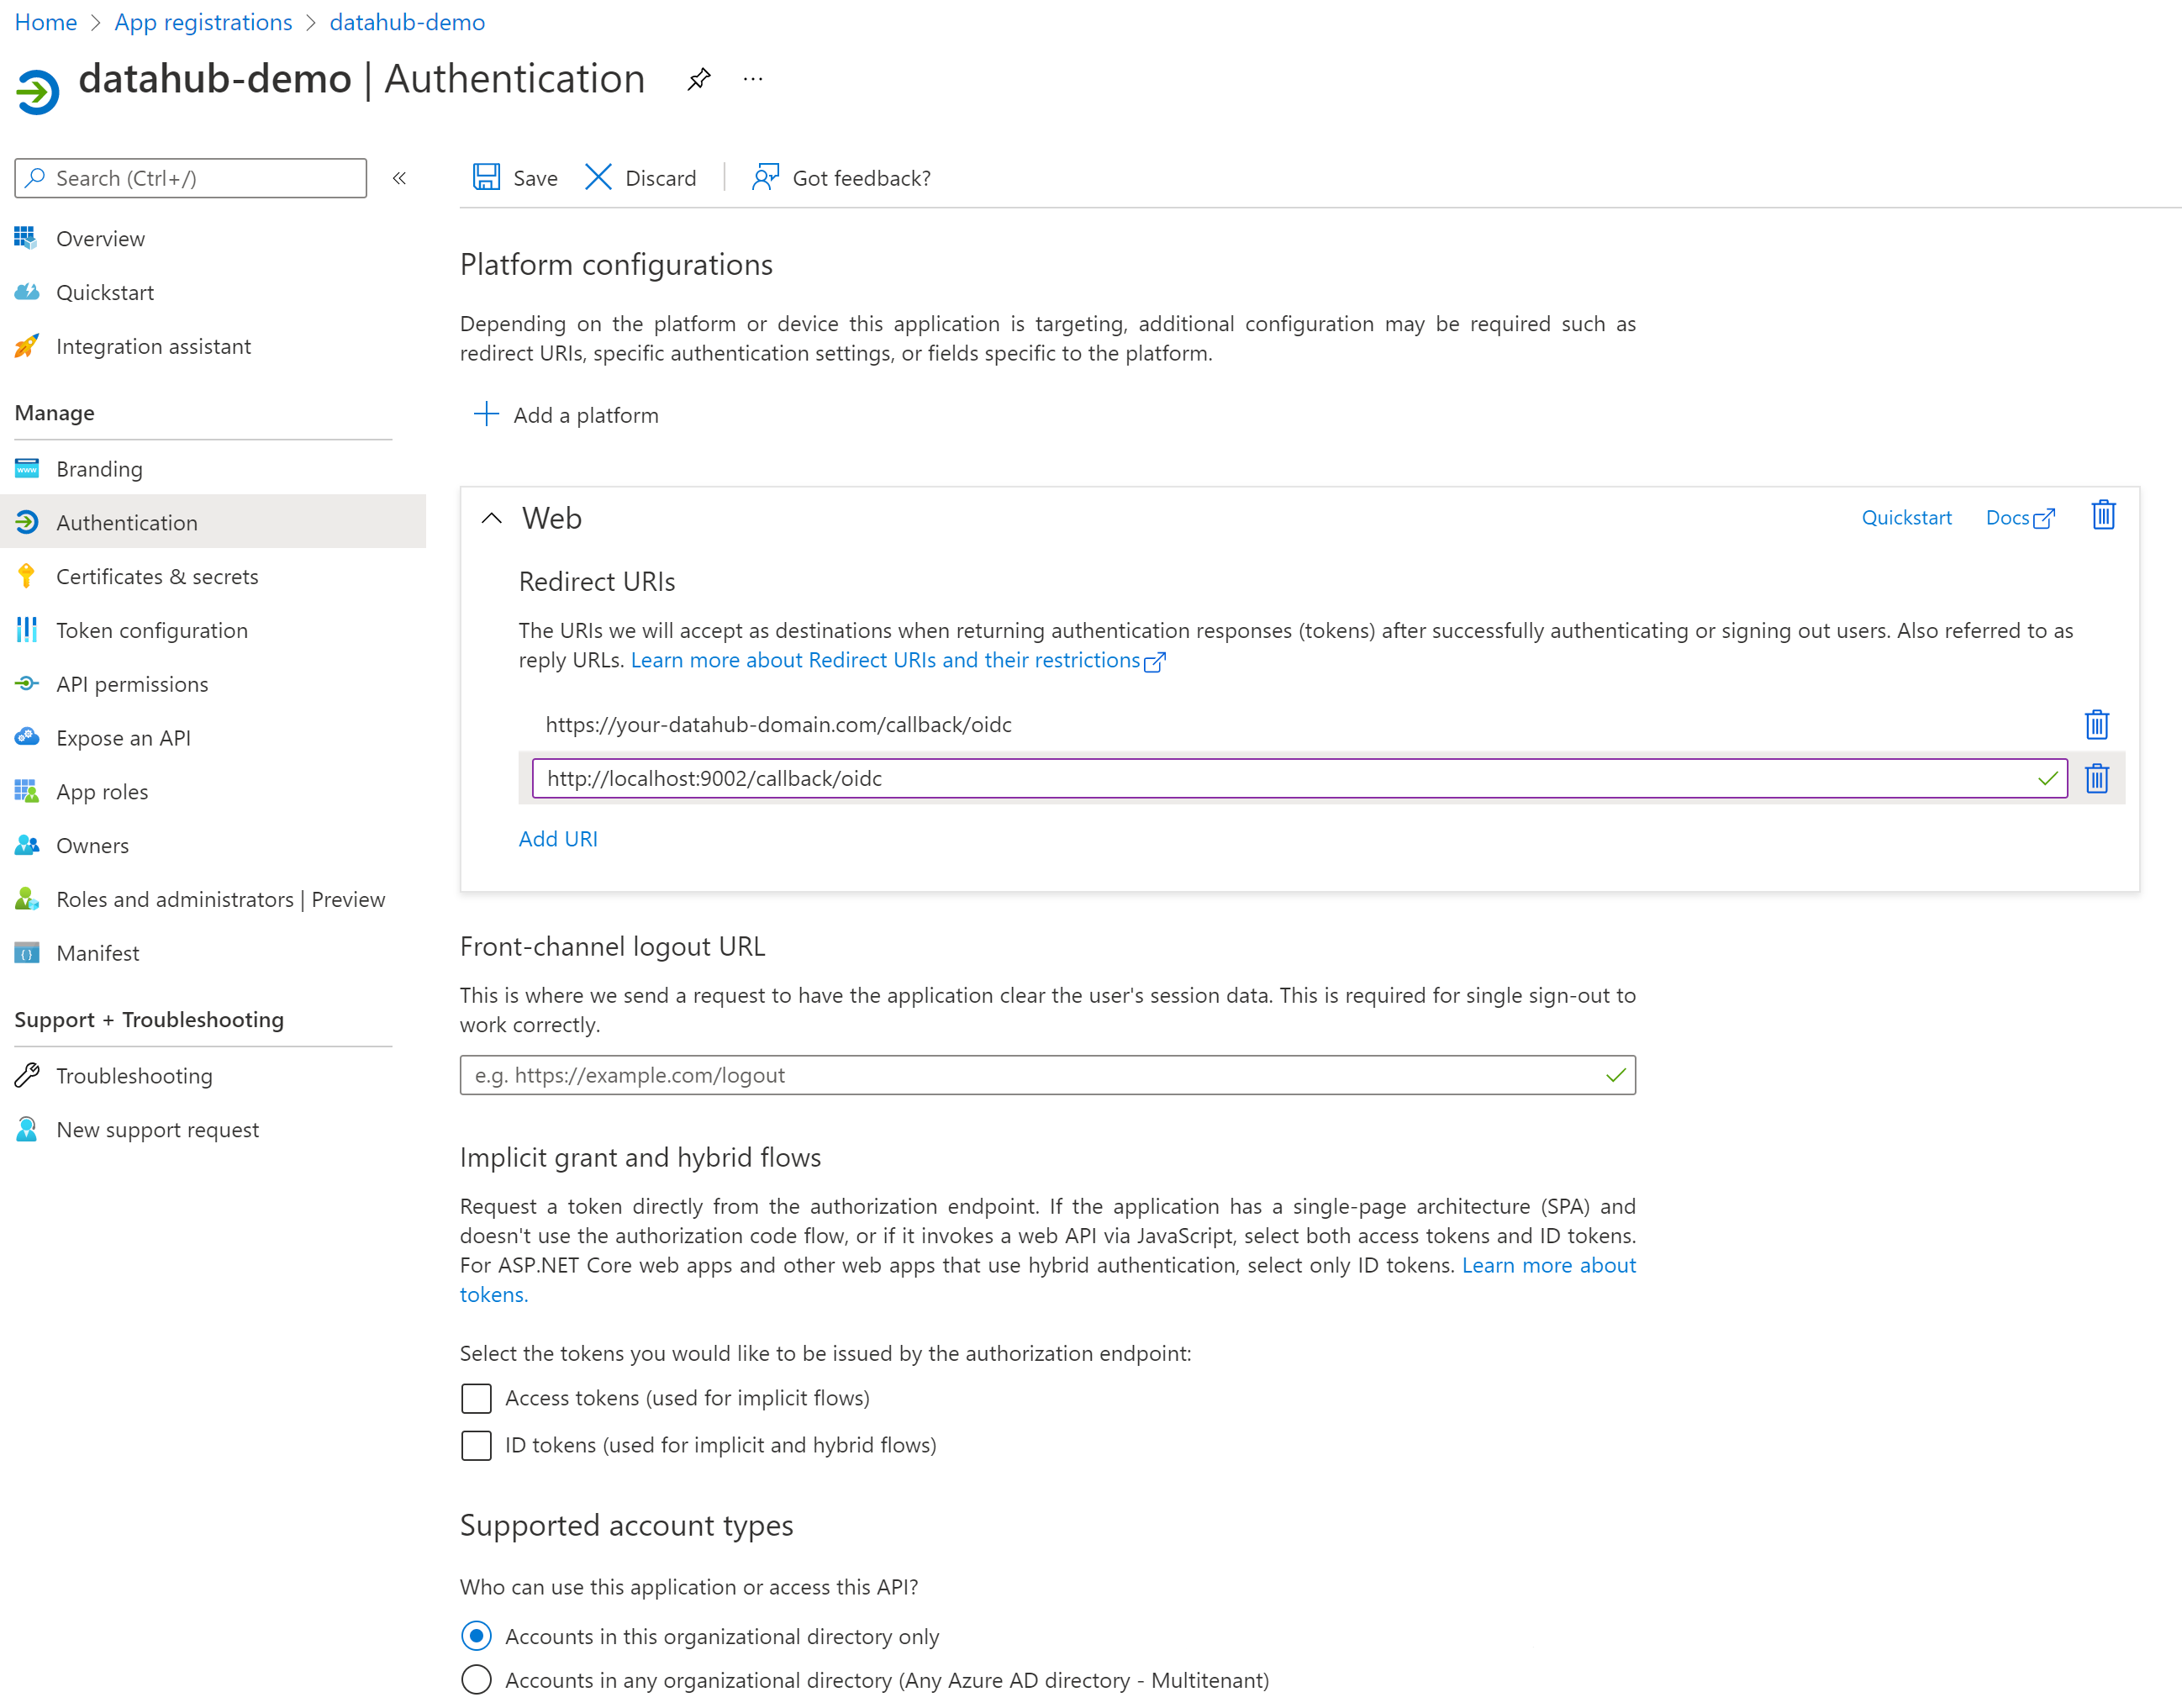
### Step 2. Client Credentials and Discovery URI
#### 1. Generate a Client Secret
You are now ready to create and configure client credentials:
1. Click **Certificates & secrets** from the left-side navigation menu.
2. Select **Client secrets**, then **New client secret**.
3. Provide a Name for the secret and set an expiry.
4. Click **Add**.
5. Copy the secret **`Value`** to be used as the **Client Secret** in DataHub SSO configuration; **Azure will not display this again**.
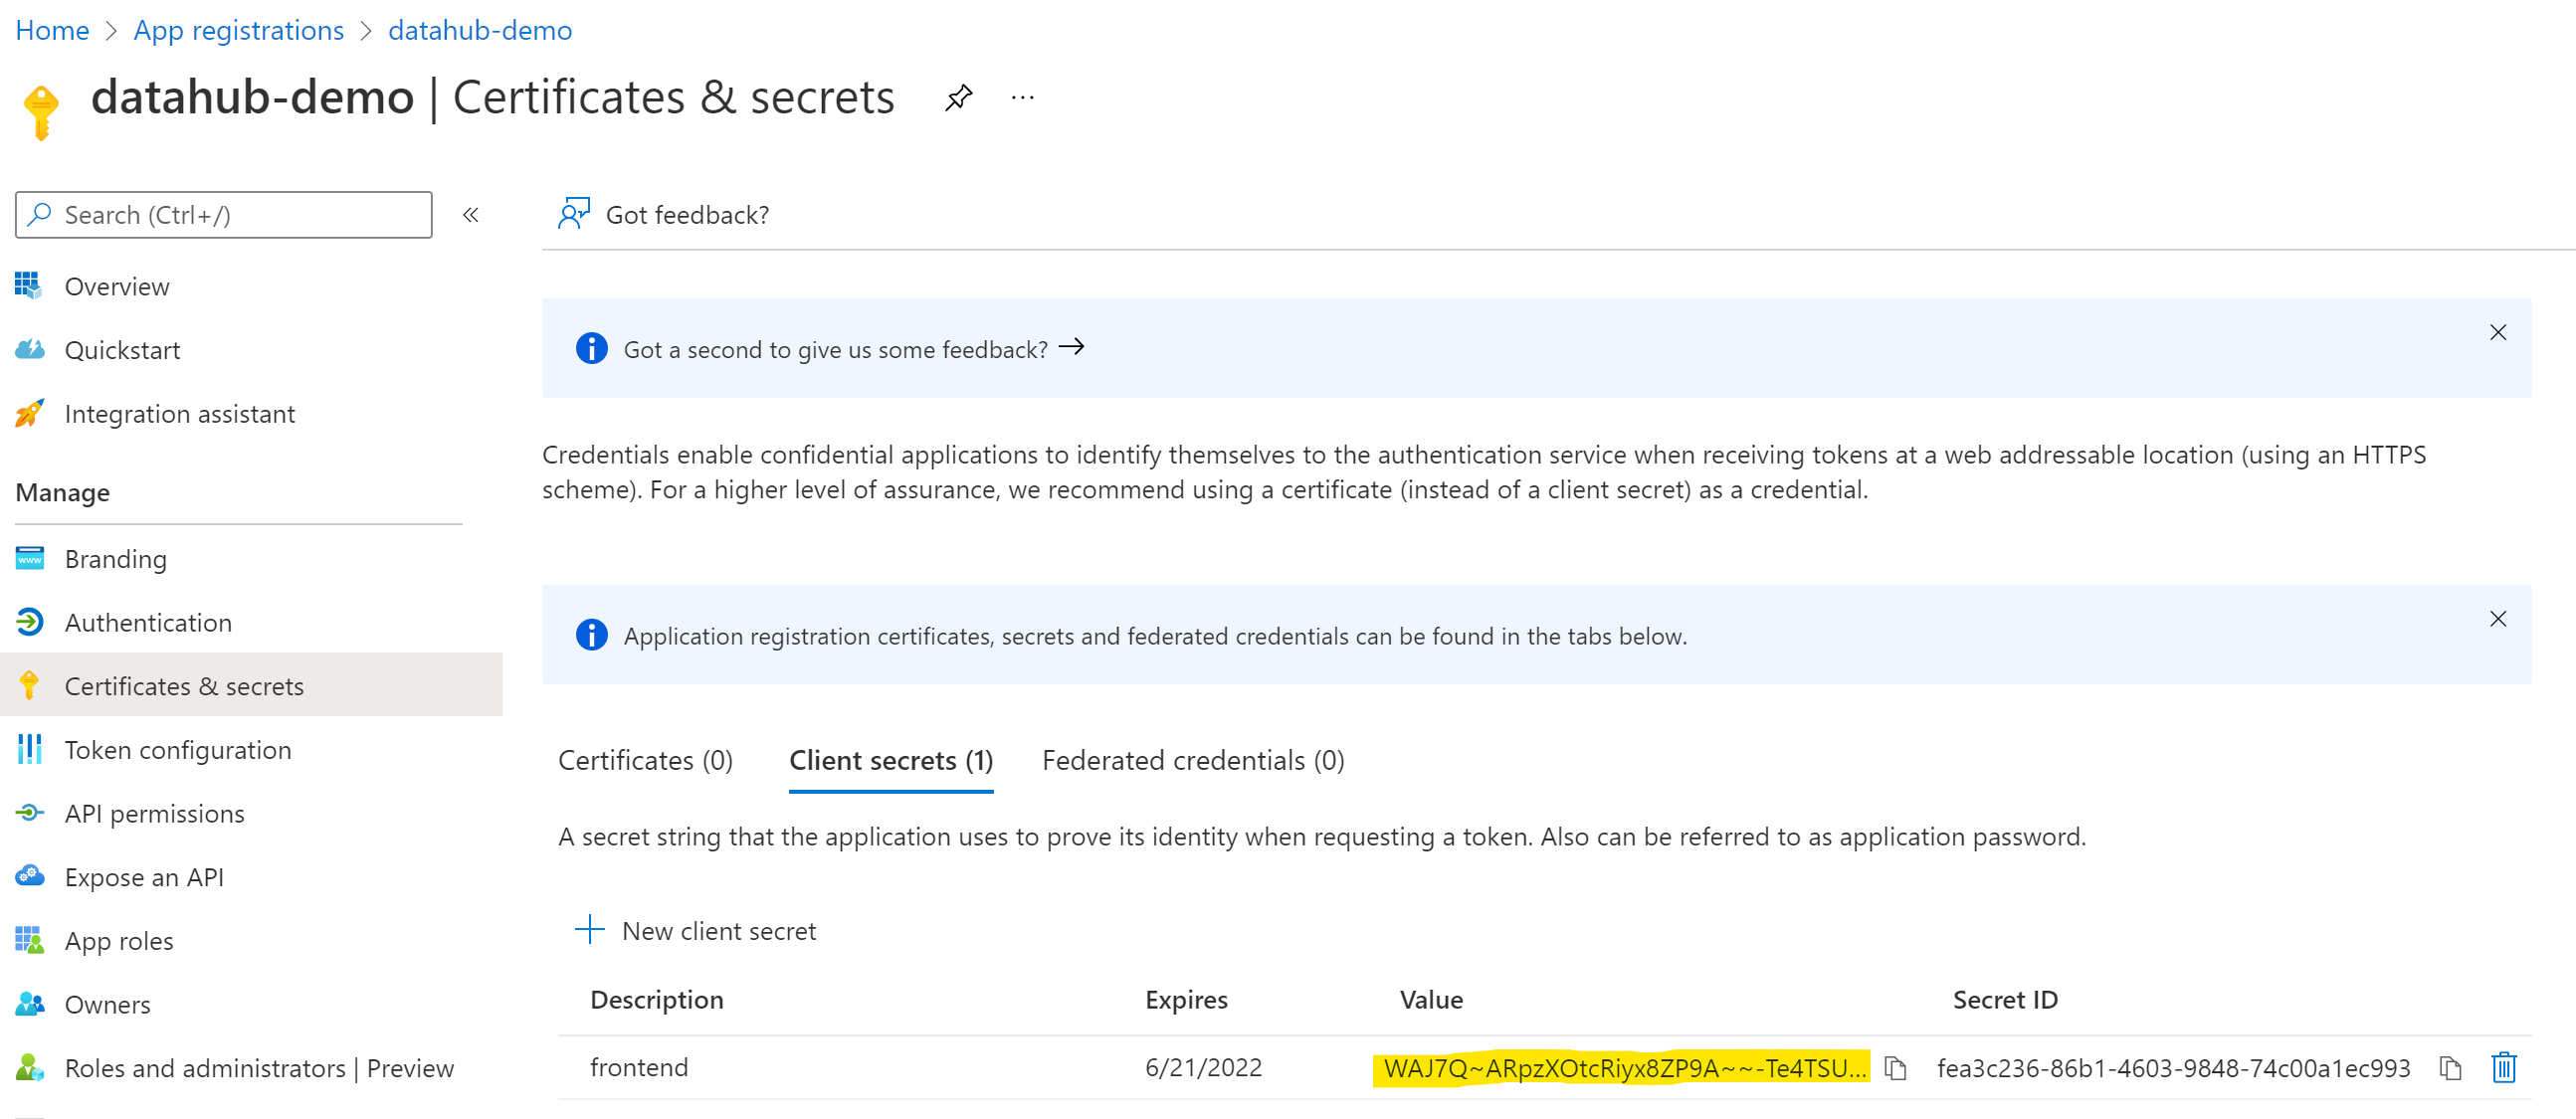
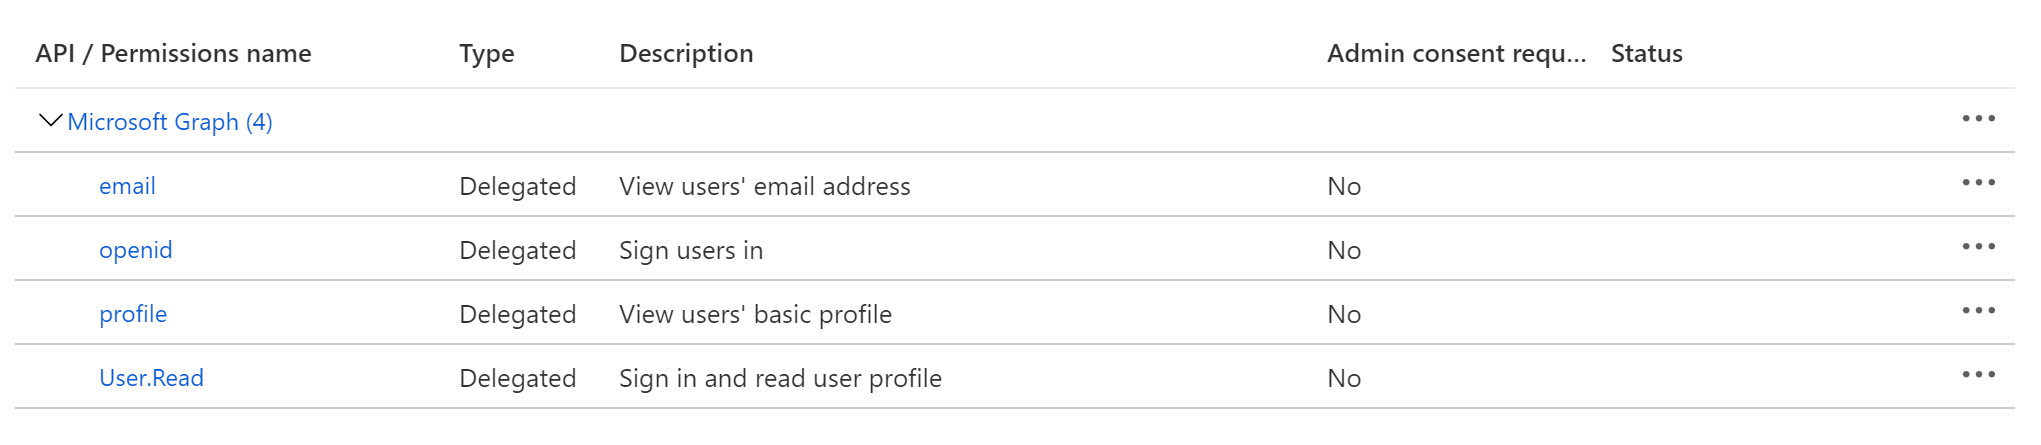
#### 2. Configure API Permissions
Next, you will configure the appropriate API permissions to enable SSO with DataHub.
1. Click **API permissions** from the left-side navigation menu.
2. Click **Add a permission**.
3. Under the **Microsoft APIs** tab, select **Microsoft Graph**, then **Delegated permissions**.
4. Under the **OpenId permissions** category, select the following:
- `User.Read`
- `profile`
- `email`
- `openid`
5. Click **Add permissions**.
#### 3. Locate Client Credentials and Discovery URI
Now that you have registered your app, generated a client secret, and configured the appropriate permissions, you are now ready to enable Azure AD SSO with DataHub.
You will need the following values in the next step:
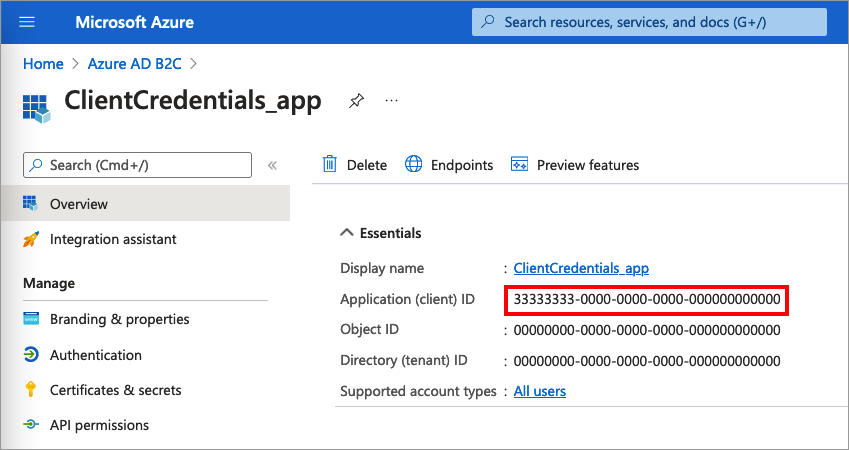
- **Application (client) ID**: Find this on the **Overview** tab. This will map to **Client ID** in DataHub.
- **Client Secret**: Stored as `Value` in the Client secret you created, above. This will map to **Client Secret** in DataHub.
- **Directory (tenant) ID**: Located on the **Overview** tab. This will map to **Discovery URI** in DataHub. It will be formatted as `https://login.microsoftonline.com/{tenant ID}/v2.0/.well-known/openid-configuration`.
### Next Steps
Once you have your **Client ID**, **Client Secret**, and **Discovery URI**, you may proceed with next steps.
### DataHub Cloud
If you're deployed with DataHub Cloud, you can enable OIDC SSO with a few clicks. [👉 See the guide here](../../../managed-datahub/integrations/oidc-sso-integration.md).
### Open Source
If you're self-deployed with DataHub Core, you'll need to configure your frontend server within your deployment environment. [👉 See the guide here](./configure-oidc-react.md).